Recently I have been enjoying using Comet for my experiments and I am always surprised by the new features I discover. Today I would like to talk to you about the possibility provided by Comet to keep track of the Machine Learning model to send into production.
Suppose we run many different experiments to solve a certain problem. After several tests, we understand that the X model is the best and we want to choose it as the production model. Well, Comet allows us to do this thanks to the functionality provided by the Registry.
A Comet Registry is a place that stores all the registered models. A registered model is a model saved in a Comet project. There are at least two advantages of registering models in Comet:
- Keep track of all the stages of our project;
- Use the Registry as secure storage.
To make a model available in the Comet Registry, firstly we need to register it. We can follow two strategies to register a model:
- Use
experiment.log_model(name, file_name)— this method of theExperiment()class logs the model as an artifact and then, manually, we need to add it to the Registry. - Use
experiment.register_model(MODEL_NAME)— this method ofExperiment()class registers the full experiment and adds it to the Registry.
In this article, I will describe how to add a model to the Registry through the log_model() method. The article is organized as follows:
- Setup of the scenario
- Log the models in Comet
- Register the models in Comet
Setup of the Scenario
In this example, we will model the same dataset with two different Machine Learning models, and we will use Comet to select the best one. As a sample dataset, we will use the classical diabetes dataset provided by the scikit-learn Python package.
Firstly, we import the dataset:
from sklearn.datasets
import load_diabetes
diabetes_dataset = load_diabetes()
X = diabetes_dataset.data
y = diabetes_dataset.target
Then, we split it into training and test sets, through the train_test_split() function provided by scikit-learn:
from sklearn.model_selection
import train_test_split
X_train, X_test, y_train, y_test = train_test_split(X,
                                                    y,
                                                    test_size=0.20,
                                                    random_state=42)
Log the Models
Now we define a function, named run_experiment(), that receives the name and the model object as input:
import numpy as np
import pickle
from comet_ml import Experiment
from sklearn.linear_model import LinearRegression, LogisticRegression
from sklearn import metrics
def run_experiment(name, model):
    experiment = Experiment(api_key="MY_API_KEY",
                            project_name="MY_PROJECT_NAME",
                            workspace="MY_WORKSPACE")

    model.fit(X_train,y_train)
    file_name = name + '.pkl'
    with open(file_name, 'wb') as file:
        pickle.dump(model, file)
    y_pred = model.predict(X_test)

    RMSE = np.sqrt(metrics.mean_squared_error(y_test, y_pred))
    experiment.log_metric("RMSE", RMSE)
    experiment.log_model(name, file_name)
The previous function performs the following operations:
- Create a new experiment
- Fit the model
- Dump the model to a file through the pickle package
- Calculate the Root Mean Squared Error (RMSE)
- Log the RMSE value and the model in Comet
Note that we have used the log_model() method to log the model in Comet. In this case, we have logged only the model. If we wanted to log the whole experiment, we would have to use the register_model() method.
Finally, we call the defined function to run two experiments, as follows:
model = LinearRegression()
run_experiment('LinearRegression', model)

model = LogisticRegression()
run_experiment('LogisticRegression', model)
We have built a Linear Regression model and a Logistic Regression model. We run the code and access the results directly in Comet.
Which of the two will perform better? Let’s find out together!
We can compare the output of the two experiments directly in the Comet dashboard. We can select both the experiments and then compare the respective RMSE:

Video by Author
The second experiment (that corresponds to the Linear Regression) outperforms the first one.
Want to see more of Comet in action? Check out working sessions, demo videos, and more on our YouTube channel.
Register the Models
Under the Experiment section we have two experiments, one for the Linear Regression and the other for the Logistic Regression, as shown in the following figure:

Image by Author
We click on the first experiment, and we select the Assets & Artifacts tab.
Under the models directory, we can find the specific model file, as shown in the following figure:
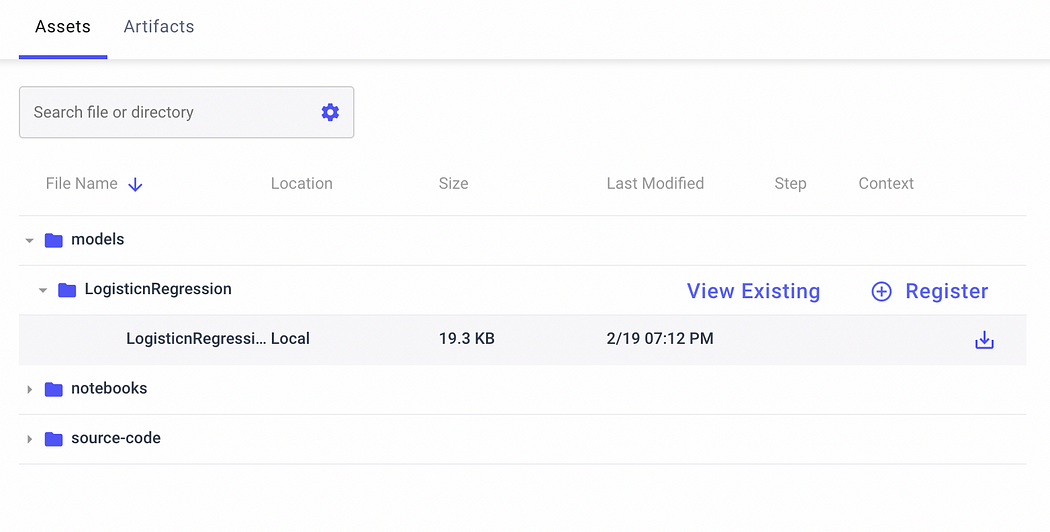
Image by Author
We can download the model if we want. On the right part of the screen, there is a button, named Register. We can click it to add the model to the Registry. The following window opens:
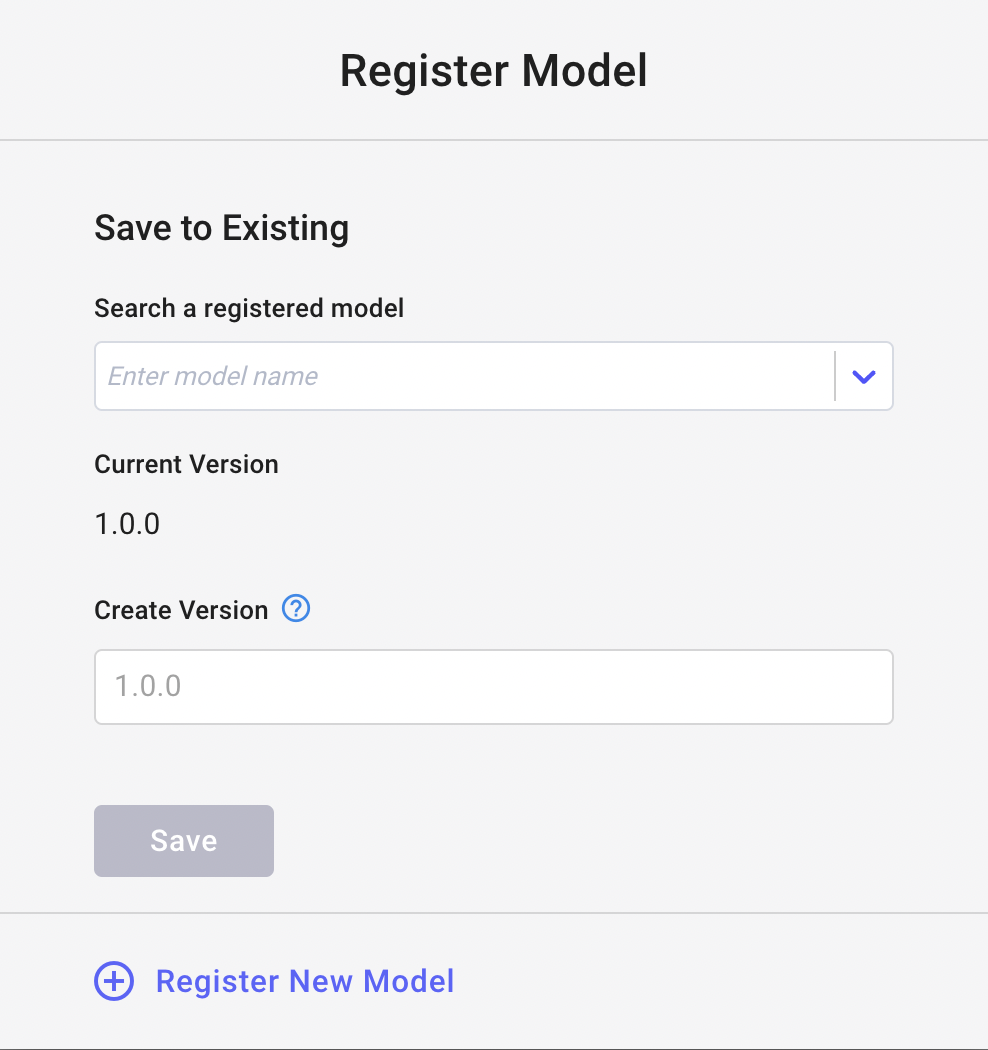
Image by Author
We can add the model to an existing Registry or we can register a new model. In our case, we register a new model.
We can repeat the same procedure for the second experiment, but when we need to add the model to the Registry, we save it to the existing model, i.e. the previous one. In this case, we need to change the model version, e.g. 1.0.1.
We can now access the Model Registry from the Comet main dashboard. We need to exit the current project. We should have a view similar to the following one:
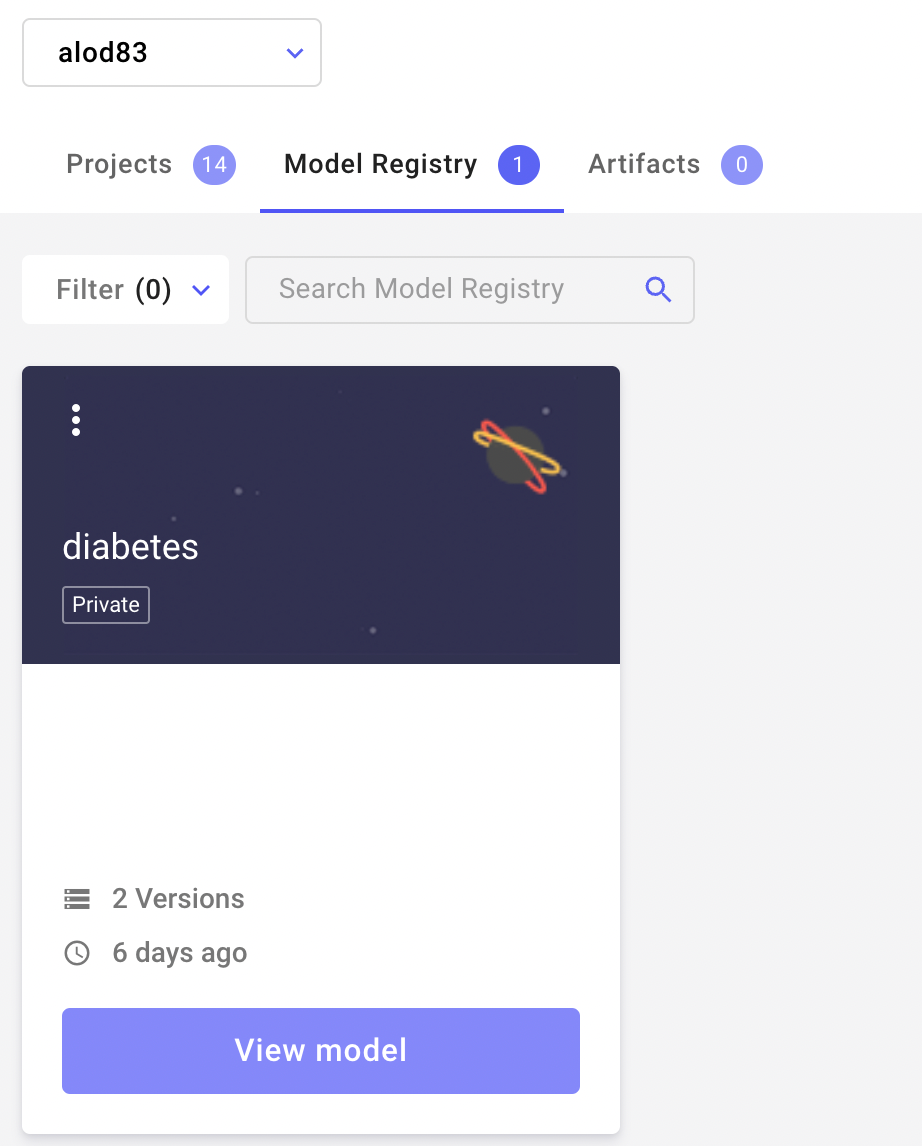
Image by Author
We click the View model button. We have the two models:
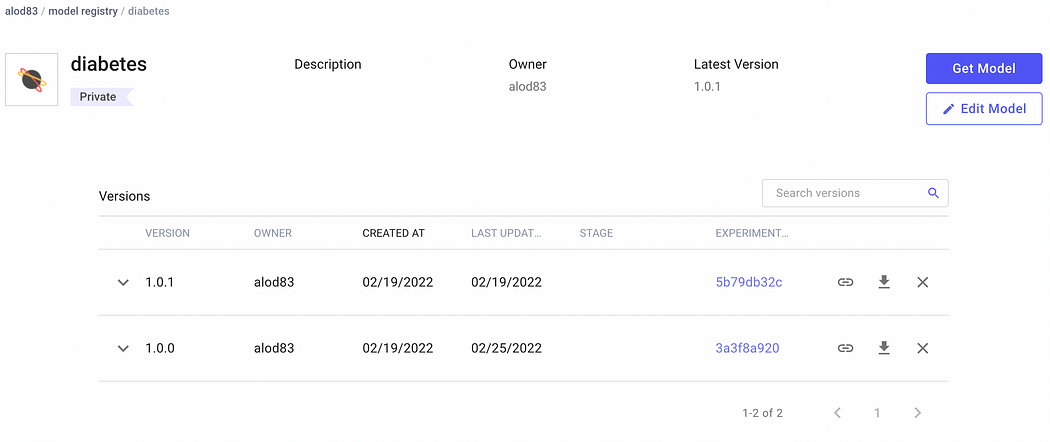
Image by Author
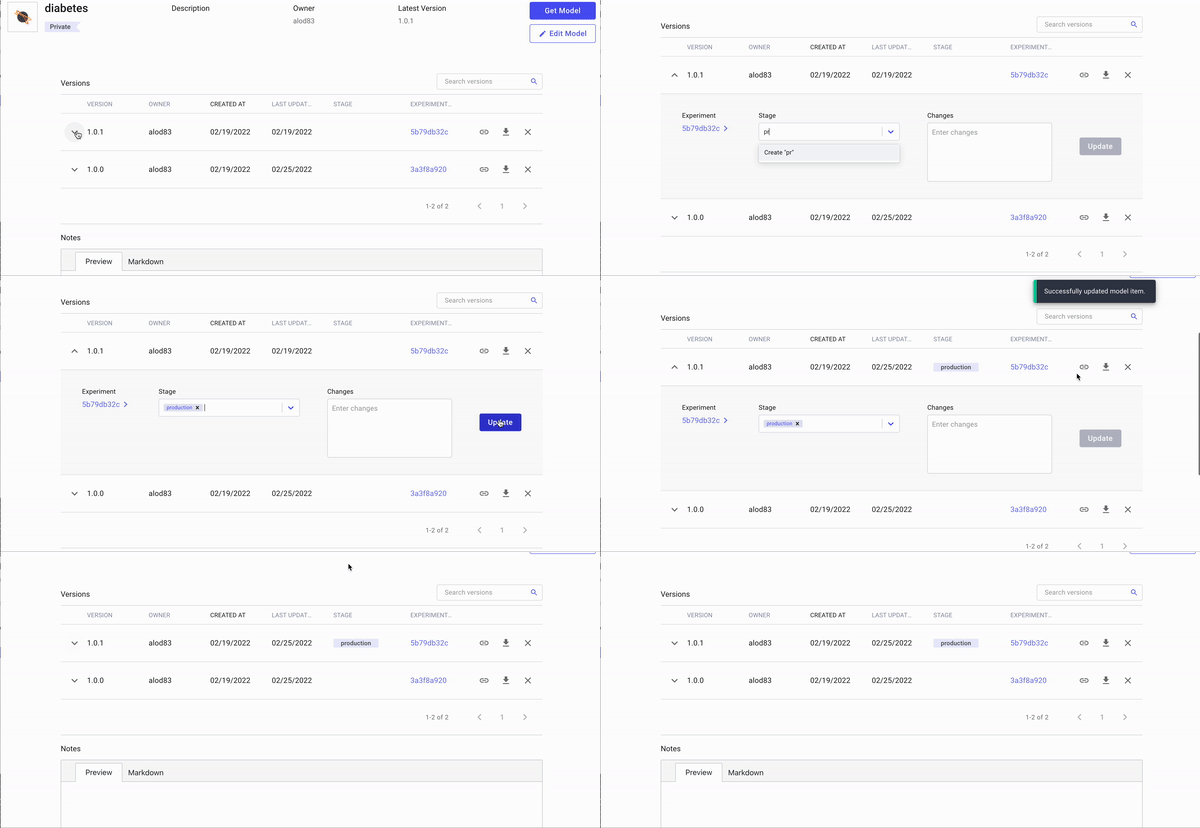
We can now set the stage of version 1.0.1, which corresponds to the linear regression, to production by clicking the arrow on the left, as shown in the following short video:
Video by Author
Summary
Congratulations! You have just learned how to use the Comet Registry to keep track of your best Machine Learning Model!
The use of the Comet Registry can help you to maintain your code well organized and ordered.
If you want to learn more about Comet, you can read my previous articles:
