Introduction
Kangas is a tool developed by Comet that is still in the beta phase but is open-source and free to use for everyone. It’s defined as a tool for exploring, analyzing, and visualizing large-scale multimedia data. According to its GitHub page:
The key features of Kangas include:


In this tutorial, I will show you how to get started with this new open-source Computer Vision tool by experimenting with how to generate our own DataGrids, and analyze previously created ones. We will also compare DataGrids with Dataframes.
What is a DataGrid?
First, let’s see what information brings to us what we consider the main source of truth aka the world wide web. When we Google the term, DataGrid is not so accurate and the most concise is the one defined in the Kangas documentation:
“The DataGrid instance can be imagined as a two-dimensional list of lists. The first dimension is the row, and the second dimension is the column.”
As we will see later in the article, a DataGrid could be comprised besides data itself (strings and integers), also by images.
The DataGrid instance has the following attributes:
- Columns: list of column names, or a dictionary of column names mapped to column types.
- Data: list of lists where each is a row of data.
- Name: the name of the tabular data
The methods to explore data are very similar to the ones on the pandas library:
dg.info():Shows the data about rows, columns, and datatypesdg.head():Shows the first few rows of a DataGriddg.tail():Shows the last few rows of a DataGriddg.show():Opens up an IFrame (if in a Jupyter Notebook) or a web browser page showing the DataGrid UI
Let’s put Kangas into action and work on some examples of data visualization. But first, as you may know with other Python libraries, you’ll need to install it in your environment or create a brand new venv.
If you are working on a Notebook:
%pip install kangas
Or if you are in the command line:
pip install kangas
Once that’s done just:
import kangas as kg
Creating a DataGrid from scratch
This Jupyter Notebook has all the code where this analysis is done. First we will use theDataGrid class from the kangas package, to achieve this we will use the append() method by passing a list of different data types to the DataGrid:
Make sure you give your DataGrid a name, otherwise it will be saved in your temporary directory and when you’re done with your DataGrid you can call dg.save() and just use the append method just before saving, after saving you can use extend() method.
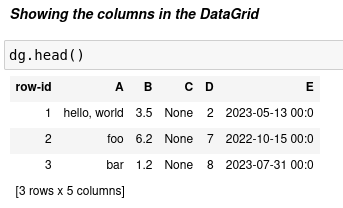
In order to show the rows in the DataGrid, we can use a method very well know for pandas or even unix users, the head() one:
If no column names are passed as parameters, A,B,C,D … and so on are inferred as column names, note as well that when appending new data you need to keep the same order the were created:

Appending new columns to the DataGrid
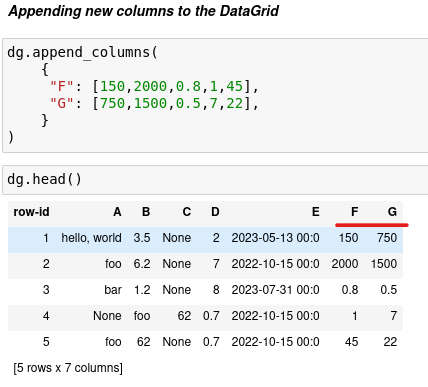
Before saving our DataGrid, let’s add some new columns, we can append 1 or multiple columns:
Appending one column:
dg.append_column("column name", [row1_value, row2_value, row3_value, ...])
Appending multiple columns:
dg.append_columns(
    {
     "column 1 name": [row1_col1, row2_col1, row3_col1, ...],
     "column 2 name": [row1_col2, row2_col2, row3_col2, ...],
    }
)
We are gonna append two new columns to our test DataGrid:
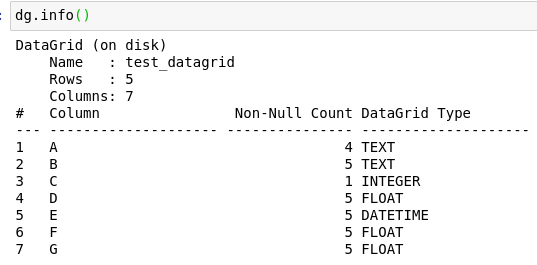
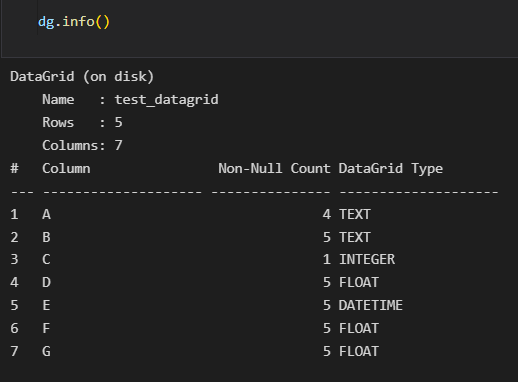
Now we will use the info() method to see how is comprised our DataGrid, just like in pandas:
We can also use the nrows ncols or the shape methods to check to the number of rows, columns or (rows, columns) in the DataGrid.
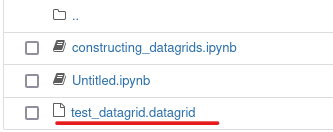
Once we have checked all the info that has our DataGrid we can save it to disk:
The DataGrid will be saved with the name you give it in the same directory that you are working:

Visualizing the data in our DataGrid
In order to visualize the data that we have stored in our DataGrid we have 2 options, visualize it inline in the Jupyter Notebook itself or start the Kangas server.
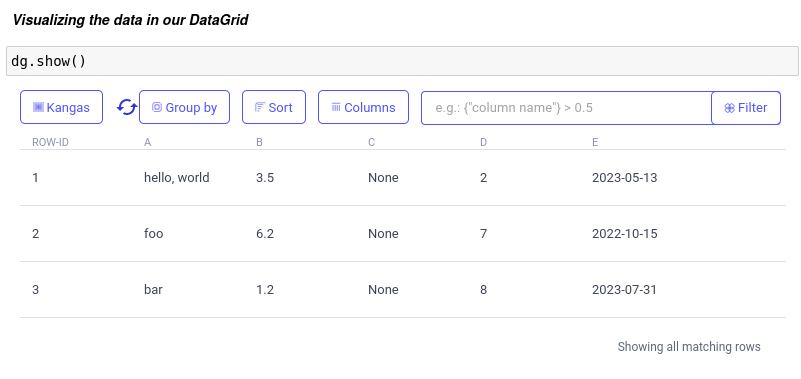
For the first option we need to execute dg.show() in one cell of the notebook:
Above you can see the data visualizations in the Kangas UI. Just if we have a larger DataGrid, we can be able to GroupBy, Sort, Select certain columns, and make custom filters.
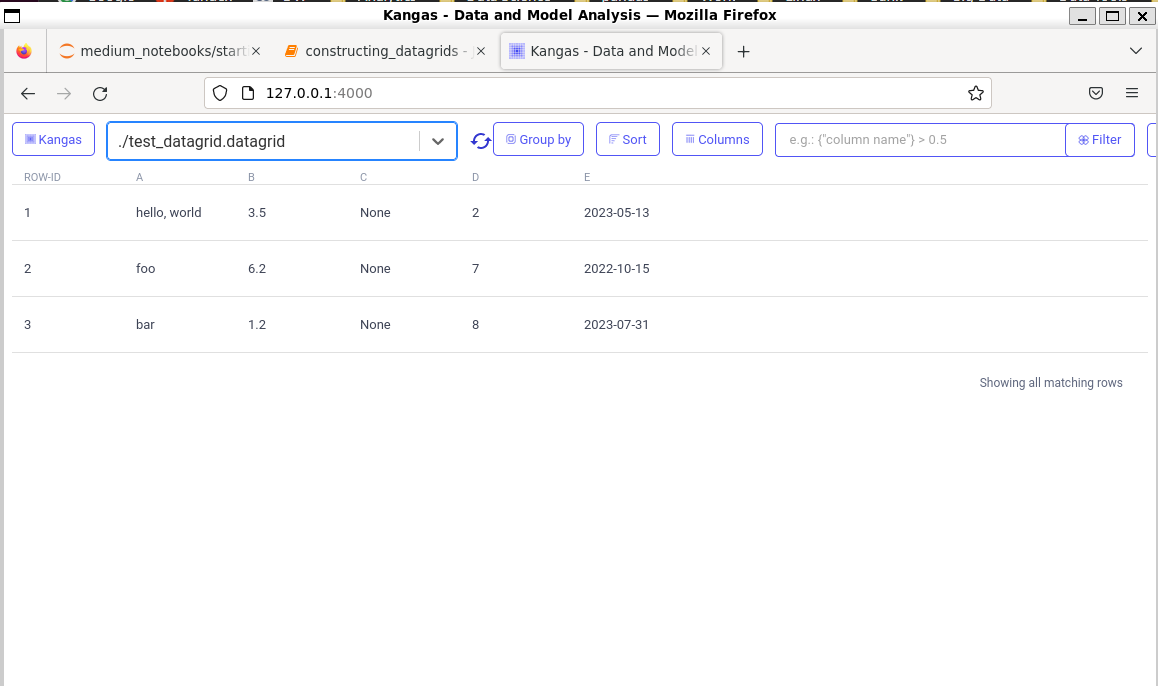
The second option is starting the Kangas server, we need to write in the command line just that, kangas server and it will trigger the web server for us:
A nice UI will be opened when you type the address in your preferred browser http://127.0.1.1:4000/and all the DataGrids you have saved in that directory will be visualized in that web server:
Comparing DataGrids with DataFrames
In the case of the pandas DataFrames, the basic structure is a spreadsheet comprised of rows and columns. The datatypes could be strings, numbers, booleans and dates, among others. Almost all people in the field of data should be at least familiar with DataFrames and know that some built-in functions and methods can be used to give a first look and inspect the data, some of them like dg.head() , dg.tail() and dg.info() will be familiar to those coming from python pandas or R tidyverse.
The same DataTypes are in Kangas DataGrids. These include text, integers, float and dates, with the addition of images:
Conclusion
We will be covering more features of this amazing tool for analyzing, exploring and visualizing large-scale multimedia data in the next articles. I leave you with the documentation of the open-source Kangas project. You can learn more on its features on GitHub.