
A guest post from Fabrício Ceolin, DevOps Engineer at Comet. Inspired by the growing demand for large-scale language models, Fabrício engineered a cost-effective local LLM server capable of running models with up to 70 billion parameters. In this guide, you’ll explore how to build a powerful and scalable local LLM environment, enabling you to harness the full potential of these advanced models.
Introduction
As the demand for large-scale language models (LLMs) continues to grow, particularly for running local AI agents, developers and researchers face significant challenges in managing the computational requirements of these powerful models. Running LLMs locally presents several hurdles, including the need for substantial hardware resources, high operational costs, and complex software configurations. These challenges are often a barrier for those who wish to experiment with, debug, and optimize LLM code without relying on expensive cloud-based solutions.
This article addresses these challenges by providing a comprehensive guide to building a low-cost local LLM server capable of running models with up to 70 billion parameters. The proposed solution leverages affordable and repurposed hardware, initially intended for Ethereum mining, combined with advanced software tools like Kubernetes and OLLAMA, to create a scalable and efficient environment for LLM development.
Following this guide, readers will learn how to assemble the necessary hardware, configure the software environment, deploy LLMs locally and run basic LLM queries. This approach reduces the cost associated with LLM experimentation and provides greater control over the development process, making it accessible to a broader audience of developers and researchers.
Audience
This guide is primarily intended for developers and researchers with some familiarity with hardware setups and software configurations, particularly around GPUs, Docker, and Kubernetes. If you are less familiar with these technologies, additional resources and explanations are provided via links to help you follow along.
Hardware Selection
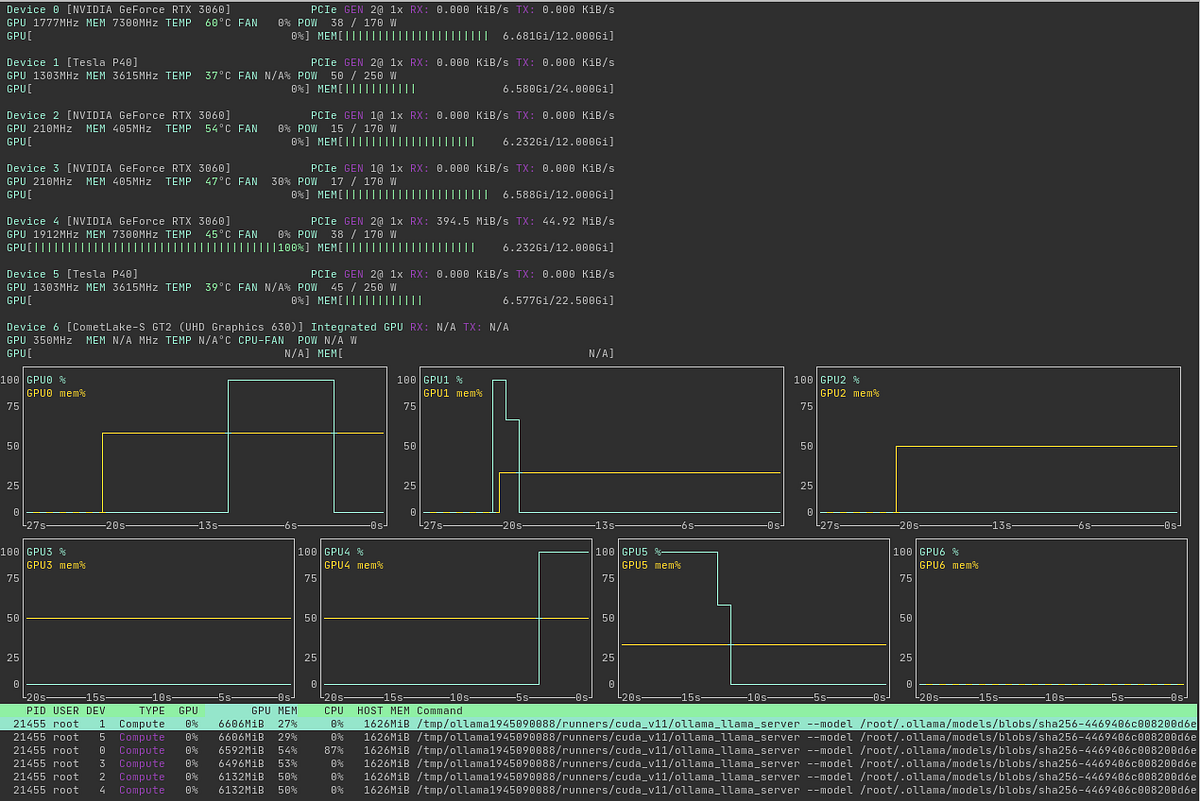
The first step in building a local LLM server is selecting the proper hardware. Depending on the response speed you require, you can opt for a CPU, GPU, or even a MacBook. For this project, I repurposed components originally intended for Ethereum mining to get a reasonable speed to run LLM agents. This approach provided both relative affordability and the computing power needed to run LLMs around the clock. I combined six GPUs to achieve a total of 96 GB of VRAM, essential for running LLMs with 70 billion parameters, which requires 84 GB of VRAM using 8-bit quantization. Here’s the hardware I used:
- Motherboard: ASUS PRIME H410M-E with two PCI Express slots.
- Riser Card: 2 PCIe 1 to 4 PCI Express 1X, Riser Card PCIe Graphics Card Expansion Card for PC.
- Graphics Cards: 6 NVIDIA GPUs, including 4 RTX 3060 (12 GB of RAM each) and 2 Tesla P40 (24 GB of RAM each, Custom FAN), totaling 96 GB of VRAM.
- RAM: 32 GB.
- CPU: 10th generation Intel Core i3.
- Power Supplies: 3 interconnected 750-watt power supplies.
- Storage: A 2 TB NVMe drive.
- GPU Interconnection: GPUs are connected to an external PCIe 1x slot via a USB cable in the riser card multiplier slot.
The total cost was around $2400. However, it’s possible to reduce costs by using an older motherboard with at least two PCIe slots and an older processor that supports AVX/AVX2 instructions. A standard spinning hard disk can be used for storage instead of an NVMe drive.
Software Configuration Overview
It would be best if you had a robust software configuration to effectively run LLMs locally. For this setup, I chose to use Kubernetes over Docker Compose. While Docker Compose is suitable for simpler environments, Kubernetes, with its advanced orchestration capabilities like dynamic scaling, automated deployment, and load balancing, is key to managing complex on-premises workloads like LLMs while also enriching my DevOps skills for handling GPU workloads.
Here’s a high-level overview of the software tools and steps involved in setting up the server:
- Kubernetes: Used to manage the execution of OLLAMA models, providing scalability and flexibility.
- OLLAMA: A versatile tool that enables the dynamic use of multiple GPUs to load and execute models locally.
- Open Web UI: A user-friendly web interface for managing OLLAMA models within a Kubernetes deployment. (A nice to have.)
This high-level overview helps you understand the structure before we dive into each component in detail.
Detailed steps
Prerequisites
You need to prepare the host to run the environment:
Step 1: k3s setup
Download the Dockerfile and Create the YAML Configuration
Download the Dockerfile and create the necessary YAML configuration for the NVIDIA device plugin.
- Download the Dockerfile:
wget https://k3d.io/v5.6.3/usage/advanced/cuda/Dockerfile
- Create the device-plugin-daemonset.yaml:
This YAML file configures the NVIDIA device plugin in Kubernetes.
Build and Run the Docker Image
Next, build and run the custom Kubernetes image with GPU support.
- Build the Docker Image:
docker build . -t localhost/rancher/k3s:v1.28.8-k3s1-cuda-12.4.1-base-ubuntu22.04
- Run the Docker Container:
docker run -d --name k3s-controlplane --gpus all -e K3S_KUBECONFIG_OUTPUT="/output/kubeconfig.yaml" -e K3S_KUBECONFIG_MODE="666" -v ${PWD}/k3s:/output --privileged -v /usr/lib/x86_64-linux-gnu/:/usr/local/cuda/lib64 --network host localhost/rancher/k3s:v1.28.8-k3s1-cuda-12.4.1-base-ubuntu22.04 server
Test the Kubernetes Setup
After running the Docker container, export the KUBECONFIG environment variable and use kubectl to test the setup.
- Export KUBECONFIG:
export KUBECONFIG=${PWD}/k3s/kubeconfig.yaml
- Test with kubectl:
kubectl get pods -A
Step 2: Deploy Open Web UI
With Kubernetes set up, you can deploy a customized version of Open Web UI to manage OLLAMA models. I deployed OLLAMA via Open Web UI to serve as a multipurpose LLM server for convenience, though this step is not strictly necessary — you can run OLLAMA directly if preferred. My customized version is based on a pre-massive Open Web UI project update. Any assistance in updating my branch to the latest main version is welcome.
- Download Open Web UI:
# This customized
git clone https://github.com/fabceolin/open-webui
cd open-webui
- Deploy Open Web UI:
helm upgrade --install -f values.yaml open-webui kubernetes/helm/
- Start Port Forwarding from Kubernetes to localhost:
nohup kubectl port-forward svc/ollama 3000:80 &
Step 3: Install and Test OLLAMA Locally to download the models
The final step is to install OLLAMA locally and test it with your configured models.
Install OLLAMA
Use Homebrew to install OLLAMA, then download and configure your LLM model.
- Install OLLAMA with brew:
brew install ollama
export OLLAMA_HOST=http://localhost:3000
# This should return the models from the localhost:3000
ollama list
- Pull the Model:
ollama pull llama3.1:70b-instruct-q8_0
- Configure the Model:
cat <<EOF >Modelfile
FROM llama3.1:70b-instruct-q8_0
PARAMETER temperature 0.1
PARAMETER stop Result
SYSTEM """"""
EOF
- Create the Local Model:
ollama create -f Modelfile fabceolin/llama3.1:70b-instruct-q8_0
- Test the model:
curl http://localhost:3000/api/generate -d '{ "model": "fabceolin/llama3.1:70b-instruct-q8_0", "prompt": "You`re a kindergarten teacher, and you need to answer a child`s question: Why is the sky blue?", "stream": false }'

{"model":"fabceolin/llama3.1:70b-instruct-q4_0","created_at":"2024-08-17T14:56:09.4438738Z","response":"What a great question!\n\nYou know how we can see lots of different colors around us, like the green grass and the yellow sunflowers?\n\nWell, when sunlight comes from the sun, it's actually made up of all those different colors, like a big ol' rainbow!\n\nBut here's the magic part: when that sunlight travels through the air in our atmosphere, it starts to scatter. That means it bounces around all over the place.\n\nAnd guess what? The blue light scatters more than any other color! It's like the blue light is playing a game of tag with the air molecules, bouncing off them and flying every which way.\n\nSo, when we look up at the sky, we see mostly the blue light because it's scattered in all directions. That's why the sky looks blue to us!\n\nIsn't that cool?\n\n(And don't worry if you didn't understand everything – it's a pretty big concept for little minds! But I hope this helps you imagine how amazing and magical our world is!)","done":true,"done_reason":"stop","context":[128006,882,128007,271,2675,63,265,264,68223,11326,11,323,499,1205,311,4320,264,1716,40929,3488,25,8595,374,279,13180,6437,30,128009,128006,78191,128007,271,3923,264,2294,3488,2268,2675,1440,1268,584,649,1518,10283,315,2204,8146,2212,603,11,1093,279,6307,16763,323,279,14071,7160,89770,1980,11649,11,994,40120,4131,505,279,7160,11,433,596,3604,1903,709,315,682,1884,2204,8146,11,1093,264,2466,8492,6,48713,2268,4071,1618,596,279,11204,961,25,994,430,40120,35292,1555,279,3805,304,1057,16975,11,433,8638,311,45577,13,3011,3445,433,293,31044,2212,682,927,279,2035,382,3112,8101,1148,30,578,6437,3177,1156,10385,810,1109,904,1023,1933,0,1102,596,1093,279,6437,3177,374,5737,264,1847,315,4877,449,279,3805,35715,11,65128,1022,1124,323,16706,1475,902,1648,382,4516,11,994,584,1427,709,520,279,13180,11,584,1518,10213,279,6437,3177,1606,433,596,38067,304,682,18445,13,3011,596,3249,279,13180,5992,6437,311,603,2268,89041,956,430,7155,1980,7,3112,1541,956,11196,422,499,3287,956,3619,4395,1389,433,596,264,5128,2466,7434,369,2697,20663,0,2030,358,3987,420,8779,499,13085,1268,8056,323,24632,1057,1917,374,16715],"total_duration":30203319345,"load_duration":53928635,"prompt_eval_count":32,"prompt_eval_duration":186546000,"eval_count":207,"eval_duration":29918639000}curl https://localhost:3000/api/chat -d '{ "model": "fabceolin/llama3.1:70b-instruct-q8_0", "prompt": "Why is the sky blue?" }'
Testing OLLAMA with a Crew.ai Agent
To demonstrate the capability of this setup, here’s an example of running a simple Crew.ai agent:
python3 -m venv env
source env/bin/activate
python -m pip install -r requirements.txt
python example-crew.ai.py
[DEBUG]: == Working Agent: Math Professor
[INFO]: == Starting Task: what is 3 + 5


> Entering new CrewAgentExecutor chain...
To solve this problem, I will simply add 3 and 5 together using basic arithmetic operations.

I will take the numbers 3 and 5 and combine them by counting up from 3, adding 5 units to get the total sum.

This is a simple addition operation that follows the rules of basic mathematics.


Final Answer: The final answer is 8

> Finished chain.
[DEBUG]: == [Math Professor] Task output: The final answer is 8


The final answer is 8
With shell-gpt, you can generate git commit messages.
# Please use my forked LiteLLM branch instead of the main project - PR link: https://github.com/BerriAI/litellm/pull/5148
pip install git+https://github.com/fabceolin/litellm.git --upgrade

# Add this configuration to sgpt
cat >~/.config/shell_gpt/.sgptrc <<EOF
USE_LITELLM=true
API_BASE_URL=http://localhost:3000
DEFAULT_MODEL=ollama_chat/fabceolin/llama3.1:70b-instruct-q8_0
EOF

curl -o ~/.config/shell_gpt/roles/CommitMessageGenerator.json https://raw.githubusercontent.com/fabceolin/dotfiles/master/sgpt/roles/CommitMessageGenerator.json
# Enter in a directory that you want to generate the diff commit
sgpt --role CommitMessageGenerator "$(git diff)"
"feat(ollama_chat.py): add 'follow_redirects' parameter to request configuration for improved handling of redirects in ollama_completion_stream function"
Next Steps
In the next phase of this project, I plan to integrate ngrok to enable secure remote access to the local LLM server. Ngrok will securely expose the local API over the internet, making it accessible from anywhere while maintaining a strong security posture. This feature is particularly valuable for accessing the server remotely or collaborating with others across different locations.
Additionally, I’ll be running agents continuously and need a reliable tool to monitor their activity. Comet is launching a new product with a user-friendly interface designed specifically for this purpose, and I plan to integrate it to streamline the monitoring process.
Conclusion
Building a local LLM server capable of running models with 70 billion parameters might seem daunting, but it becomes achievable and cost-effective with the proper hardware and software. By repurposing Ethereum mining hardware and leveraging tools like OLLAMA and Kubernetes, you can create a robust, scalable environment for developing and deploying advanced language models right from your own setup.
This project highlights not only the technical feasibility but also the practical benefits of maintaining a local LLM server. From cost savings to greater control over your infrastructure, the advantages are clear, especially for developers and researchers looking to push the boundaries of AI without relying on expensive cloud solutions.
References
1. Local Large Language Models Hardware Benchmarking: Ollama Benchmarks (CPU, GPU, MacBooks)
2. How much memory do I need in GPU to run Ollama?
3. Ollama Issue #644: GPU Support
4. How to Install NVIDIA Support for Ollama
5. How to Enable GPU Support in Docker for Ollama
6. Open-WebUI: A Web UI for Open-Source LLMs
7. LiteLLM: A Lightweight Framework for LLMs
